Veneer: Complete Guide to Types, Uses, Price & How to Choose for Furniture & Doors
Complete veneer guide natural vs engineered types, uses for furniture & doors, price range. Learn how to choose, apply & maintain veneer sheets.
Quick Decision Summary
Veneer is a thin slice of real wood bonded to plywood, MDF, or particle board to deliver authentic wood aesthetics at a fraction of solid timber cost.
If you're in a hurry: Natural veneer offers genuine wood grain and premium appearance for furniture doors, wardrobes, and wall panels. Engineered (reconstituted) veneer provides uniform patterns at lower cost. For Indian conditions, always use veneer on a moisture-resistant substrate, ensure proper edge sealing, and avoid direct water contact. Expect veneer sheets to cost between ₹45–₹350 per square foot depending on species, thickness, and backing type.
- Choose veneer if: You want authentic wood beauty without solid wood weight and cost, need consistent grain matching across large surfaces, or want design flexibility for furniture faces and door skins.
- Avoid veneer if: The application involves constant water exposure (bathroom cabinets near shower), you cannot ensure proper edge banding, or your budget doesn't allow for skilled finishing work.
Key takeaway: Veneer delivers real wood character but demands proper substrate selection, edge protection, and finishing to perform well in Indian humidity conditions.
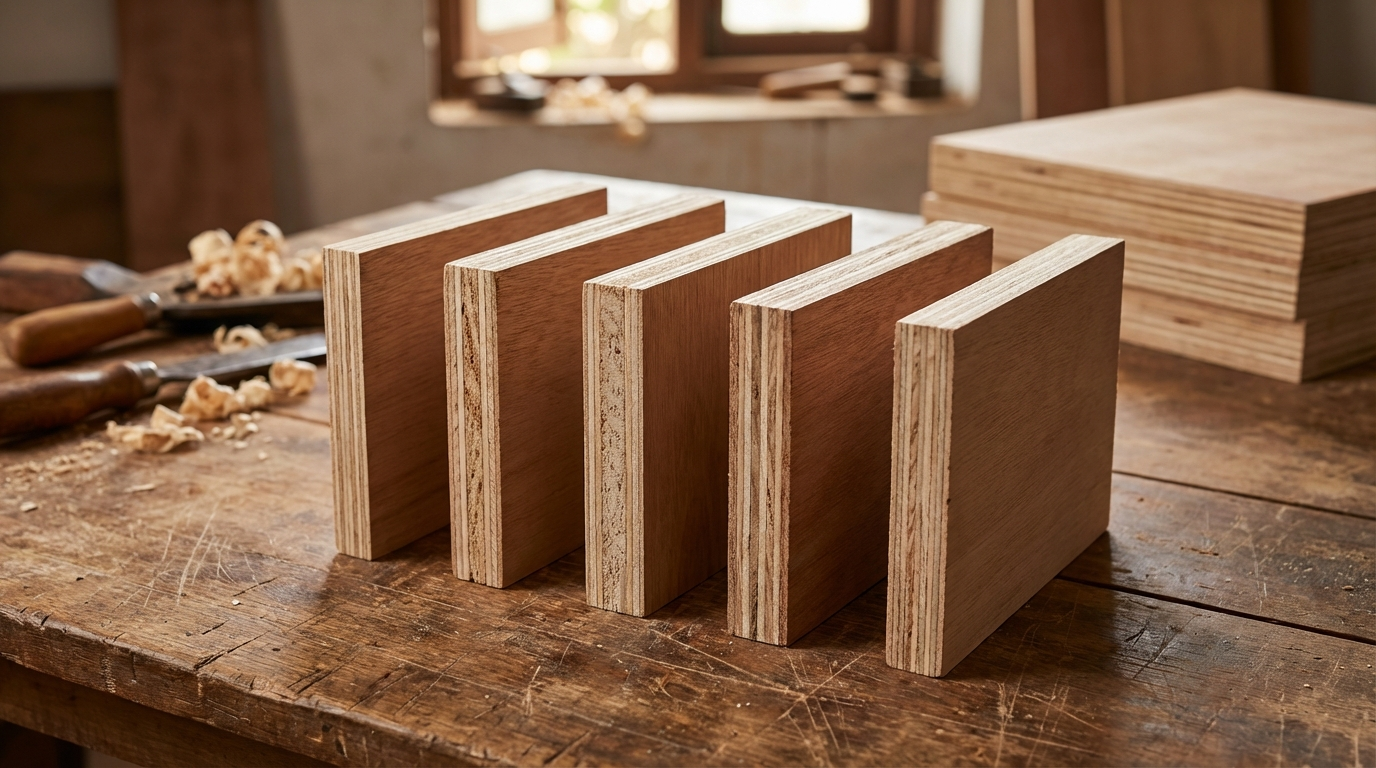
What Veneer Actually Means: Material, Construction, and Grading
Veneer is a thin layer of real wood—typically 0.3mm to 3mm thick—sliced or peeled from logs and applied to engineered substrates like plywood, MDF, or blockboard. Unlike laminate (which is printed paper with resin), veneer contains actual wood cells, displaying genuine grain patterns, natural colour variations, and authentic texture that synthetic surfaces cannot replicate.
The construction process involves slicing logs using different cutting methods that determine the final grain appearance. Rotary cutting peels the log like unrolling paper, producing broad, random patterns. Plain slicing (flat cut) creates cathedral-shaped grain patterns common in teak and oak veneers. Quarter slicing produces straight, parallel grain lines preferred for formal furniture. Rift cutting, used mainly with oak, eliminates the flaky medullary ray pattern.
Understanding Veneer Grades
Veneer grading in India loosely follows international standards. "A Grade" or premium veneer features minimal defects, consistent colour, and well-matched grain—ideal for visible furniture faces. "B Grade" allows minor colour variation and small repairs, suitable for less prominent surfaces. "Backing grade" veneer, meant for concealed surfaces, permits significant variation and repairs.
Common misconceptions include believing veneer is "fake wood" (it's real wood, just thin) and assuming all veneer peels easily (quality veneer with proper bonding and finishing lasts decades). Another myth is that veneer cannot be refinished—while you cannot sand it repeatedly like solid wood, light restoration is possible with care.
Bottom line: Veneer provides authentic wood character through thin but genuine wood slices bonded to stable substrates, with quality determined by species, cut type, and grading.
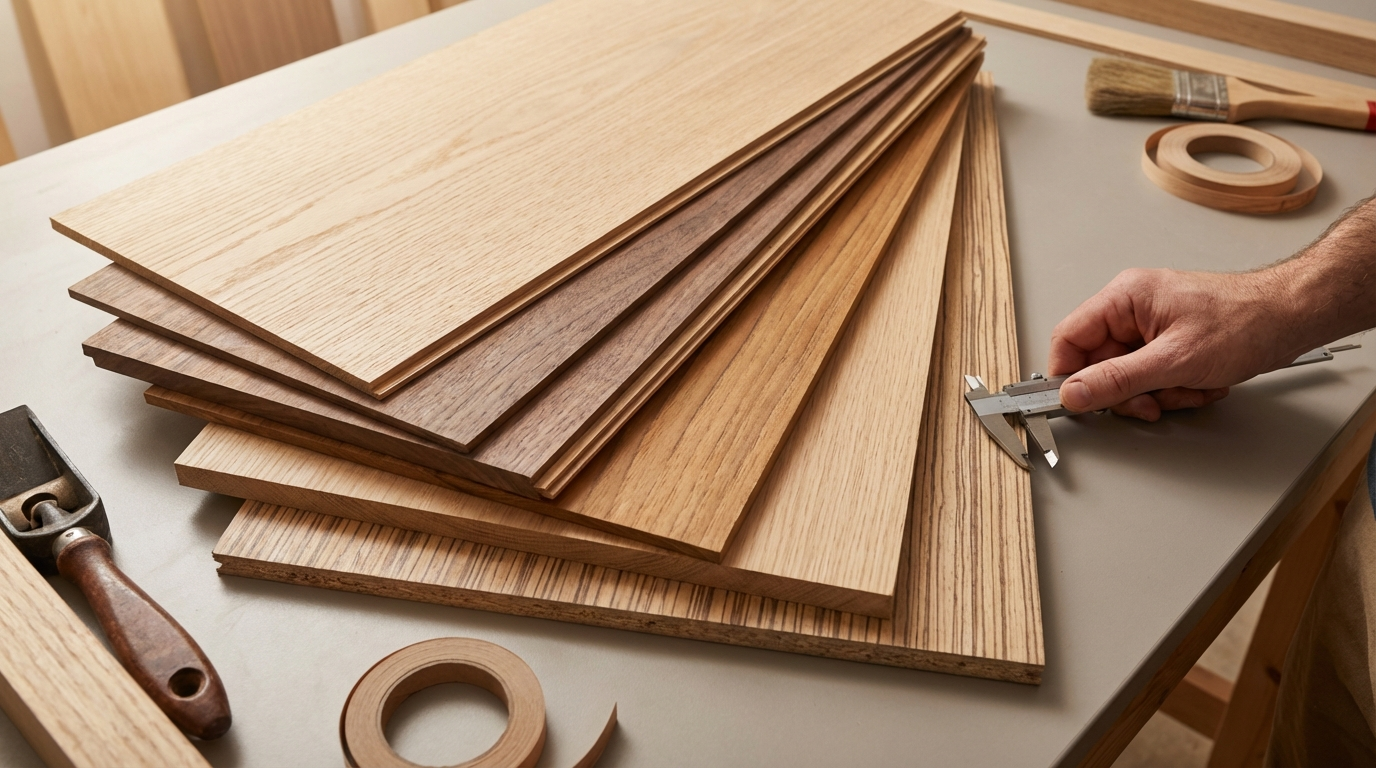
Types of Veneer: Natural, Engineered, and Specialty Categories
Veneer types fall into three main categories: natural wood veneer sliced directly from logs, engineered (reconstituted) veneer manufactured for uniformity, and specialty veneers modified through dyeing, smoking, or other treatments. Each serves different design needs, budget ranges, and application requirements in Indian interiors.
Natural Wood Veneer
Natural veneer preserves the unique character of each tree—no two sheets are identical. Species popular in India include teak (golden-brown, durable, widely available), walnut (rich dark tones, premium pricing), oak (pronounced grain, Western aesthetic), rosewood (deep colours, restricted availability), and maple (light, subtle grain). Natural veneer costs more but offers unmatchable authenticity for luxury furniture and architectural millwork.
Engineered (Reconstituted) Veneer
Engineered veneer is manufactured by slicing fast-growing plantation timber, dyeing the sheets, and reassembling them into uniform blocks before re-slicing. This produces consistent grain patterns across large quantities—essential for commercial projects requiring perfect matching. Brands market these under names like "recon veneer" or "techno veneer." While lacking natural wood's uniqueness, engineered veneer costs 30-50% less and eliminates matching headaches.
Specialty Veneer Types
Dyed veneers undergo colour treatment to achieve vibrant or non-natural hues—popular for modern furniture accents. Smoked veneer is exposed to ammonia fumes, deepening colour and enhancing grain contrast without surface staining. Burr (burl) veneer comes from tree growths, displaying dramatic swirling patterns prized for luxury applications. These specialty options command premium prices but create distinctive visual statements.
Backed vs. Raw Veneer
Raw veneer sheets are delicate and require professional handling. Paper-backed veneer adds flexibility for curved applications. Phenolic-backed veneer provides superior stability for flat panel work. Fleece-backed options offer balance between flexibility and handling ease. For DIY enthusiasts and small workshops, backed veneer significantly reduces breakage and simplifies application.
India-Specific Reality Check: Moisture, Termites, and Site Conditions
Indian climate conditions pose specific challenges for veneer applications that Western guides rarely address. Monsoon humidity exceeding 80% in coastal cities, extreme temperature variations in northern regions, and persistent termite pressure across the country demand careful material selection and installation practices.
Monsoon and Humidity Concerns
Veneer itself is relatively thin and responds quickly to moisture changes. The critical factor is the substrate beneath. In Mumbai, Chennai, Kolkata, and other humid zones, veneer applied to standard MR-grade plywood or regular MDF risks delamination within 2-3 monsoon cycles. Always specify BWR-grade plywood or moisture-resistant MDF as substrates for veneer work in these regions. For coastal cities with salt-laden air, marine-grade (BWP) plywood substrates provide additional protection.
Termite Risk Management
Veneer's thin profile offers minimal termite resistance—protection comes from the substrate and finishing. Ensure the core material carries borer-and-termite treatment certification. For ground-floor installations or properties with termite history, consider additional chemical treatment of finished surfaces. Metal frames for modular furniture eliminate substrate termite vulnerability entirely.
Common Site Practice Problems
Indian construction sites often store materials improperly. Veneer sheets stacked directly on concrete floors absorb ground moisture. Sheets left in direct sunlight develop surface cracks. Uneven stacking causes warping. Insist on elevated storage away from wet work areas, protective wrapping until installation day, and climate acclimatization (letting material adjust to room conditions for 48-72 hours before application).
Is Veneer Suitable for Indian Kitchens?
Veneer works beautifully for kitchen cabinet shutters and breakfast counter faces when properly finished. The key requirements include: applying on BWR-grade substrate, complete edge banding with PVC or ABS strips, multiple coats of PU (polyurethane) lacquer or melamine finish, and avoiding placement directly adjacent to gas burners or steam-generating appliances. Our kitchen cabinet material comparison covers substrate options in greater detail for modular kitchen applications.
Veneer Uses: Where It Works Best in Furniture and Interiors
Veneer excels in applications requiring large, consistent wood-grain surfaces where solid timber would be impractical, expensive, or structurally problematic. Understanding ideal use cases helps avoid misapplication and maximizes veneer's aesthetic potential.
Furniture Applications
Wardrobe shutters represent veneer's sweet spot—large flat panels where solid wood would warp and cost prohibitively. Veneer on 18mm BWR plywood delivers stability, beauty, and reasonable weight. Bed headboards, side tables, TV unit faces, and study table tops all benefit from veneer's ability to provide continuous grain flow across joins. For desks exceeding 600mm width, veneer on engineered substrate outperforms solid wood in dimensional stability.
Door Applications
Flush doors with veneer faces dominate the Indian premium door market. The construction typically involves a blockboard or solid core with veneer applied to both faces. This delivers the visual appeal of solid wood doors at 40-60% of the cost and weight. Main entrance doors, bedroom doors, and bathroom doors (with waterproof finish) all suit veneer treatment. For guidance on door construction, our flush door buying guide explains core options in detail.
Architectural and Wall Applications
Wall paneling in living rooms, accent walls in bedrooms, and ceiling panels in premium spaces increasingly use veneer for warmth and character. Commercial applications include hotel lobbies, corporate reception areas, and retail spaces where wood ambiance matters but solid timber isn't practical. Veneer on MDF backing with proper mounting creates stunning feature walls.
Where Veneer Struggles
Bathroom vanity tops near direct splash zones, outdoor furniture exposed to rain, kitchen countertops with direct cooking contact, and high-abrasion flooring applications exceed veneer's practical limitations. For these scenarios, consider HPL laminates, solid surface materials, or engineered wood flooring specifically designed for the purpose.
Price Range and Cost Drivers (2026 Market)
Veneer pricing in India spans a wide range—from ₹45 per square foot for basic engineered varieties to ₹350+ per square foot for rare exotic species. Understanding cost drivers helps budget accurately and identify value mismatches when shopping.
Thickness and Species Impact
Thin veneers (0.3-0.5mm) cost less but require more careful handling and offer limited repair options. Standard furniture-grade veneer runs 0.5-1mm thick. Thicker veneers (1-3mm) allow light sanding and refinishing but cost proportionally more. Species selection dramatically affects pricing: locally available teak veneer costs less than imported walnut or exotic burl veneers.
| Veneer Type | Typical Price Range (₹/sq ft) | Best For |
|---|---|---|
| Engineered/Recon (basic) | 45–80 | Commercial furniture, cost-sensitive projects |
| Natural Teak (Indian) | 90–150 | Residential furniture, wardrobes, doors |
| Natural Oak/Walnut | 140–220 | Premium furniture, feature walls |
| Exotic Burr/Figured | 200–350+ | Luxury installations, statement pieces |
| Smoked/Dyed Specialty | 160–280 | Designer furniture, modern interiors |
Backing and Processing Costs
Raw veneer sheets cost less but require skilled handling. Paper-backed or fleece-backed veneer adds ₹15-30 per square foot but significantly eases application. Pre-finished veneer panels (veneer already bonded to MDF or plywood) command premium pricing but save labour costs and ensure factory-quality bonding.
Budget Estimation Method
For typical furniture estimation, calculate visible veneer area (fronts and visible sides only—interiors use laminate or paint), add 15% wastage allowance, multiply by square foot rate, then add application labour (typically ₹25-50 per square foot depending on complexity and city). Edge banding adds ₹8-15 per running foot. Finishing (PU lacquer) adds ₹30-60 per square foot.
Why Prices Vary Between Dealers
Metropolitan dealers in Mumbai, Delhi, and Bangalore often stock premium imported veneer at higher prices. Tier-2 city suppliers may offer better rates on standard varieties but limited exotic options. Volume purchases (full bundles vs. cut pieces) significantly reduce per-foot cost. Seasonal availability affects pricing—post-monsoon often sees better rates as new stock arrives.
Natural vs. Engineered Veneer: Head-to-Head Comparison
Choosing between natural and engineered veneer involves trade-offs between authenticity, consistency, cost, and application requirements. This comparison helps match veneer type to specific project needs.
| Parameter | Natural Veneer | Engineered Veneer |
|---|---|---|
| Grain Pattern | Unique, varies sheet to sheet | Uniform, consistent across batches |
| Colour Consistency | Natural variation present | Highly consistent |
| Matching Across Panels | Requires careful selection | Easy matching guaranteed |
| Cost (comparable species look) | Higher (30-50% more) | Lower |
| Availability | Species-dependent, some restricted | Readily available |
| Authenticity | Genuine wood character | Manufactured appearance |
| Environmental Impact | Uses slow-growth timber | Uses fast-growth plantation wood |
| Repair/Refinishing | Slightly easier with thicker cuts | Standard procedures apply |
When to Choose Natural Veneer
Select natural veneer for premium residential furniture where authentic wood character matters—living room entertainment units, master bedroom wardrobes, study room built-ins, and main entrance doors. Natural veneer suits clients who appreciate wood's inherent variation and view minor inconsistencies as character rather than defects. Budget should allow for careful sheet selection and potential wastage in matching.
When to Choose Engineered Veneer
Engineered veneer suits commercial projects with large consistent surface requirements—hotel room furniture, office workstations, retail display units, and multi-unit residential projects. It's practical when matching across many panels matters more than individual uniqueness. Cost-sensitive residential projects also benefit when appearance consistency and budget control are priorities.
What Thickness of Veneer is Best for Furniture?
For most furniture applications, 0.5-0.6mm veneer provides ideal balance between cost, handling ease, and durability. Thinner veneers (0.3mm) risk telegraph showing substrate imperfections and offer no refinishing buffer. Thicker veneers (1mm+) cost significantly more and provide marginal practical benefit for typical residential furniture. Reserve thick veneer for statement pieces where potential future refinishing justifies the premium.
How to Choose Veneer: 5-Step Decision Framework
Selecting the right veneer involves systematically evaluating application requirements, environmental conditions, aesthetic goals, budget constraints, and practical workability. This framework prevents costly mistakes and ensures appropriate material selection.
Step 1: Define Application and Stress Factors
Identify where the veneer will be used and what stresses it will face. High-touch surfaces (dining tables, desk tops) need durable finishes. Vertical surfaces (wardrobe shutters) face less wear. Moisture-adjacent areas (kitchen, bathroom doors) need waterproof substrates and finishes. List all environmental factors: humidity levels, temperature variations, sun exposure, cleaning frequency.
Step 2: Select Appropriate Substrate
The substrate determines structural performance more than veneer choice. Standard interiors: commercial plywood or MDF. High-humidity zones: BWR-grade plywood or moisture-resistant MDF. Doors: blockboard or engineered door cores. Curved applications: flexible MDF or bendable plywood. Never apply quality veneer to inferior substrates—the combination will fail.
Step 3: Choose Veneer Type and Species
Match species to design intent: warm traditional (teak, walnut), contemporary minimal (oak, maple), bold statement (zebrano, burr). Decide natural vs. engineered based on consistency needs and budget. Verify species availability—some exotics require long lead times. For large projects, request samples under your actual lighting conditions before committing.
Step 4: Specify Finishing Requirements
Veneer without proper finishing fails prematurely. Open-grain species (oak, ash) need pore filling before finishing. High-use surfaces need PU lacquer (3-4 coats minimum). Natural oil finishes suit low-traffic applications and offer easier maintenance. Specify exact finish expectations in writing to your carpenter or vendor.
Step 5: Verify Vendor and Material Quality
Examine actual sheets—not just samples. Check for: uniform thickness, no delamination at edges, consistent colour within bundles, proper storage conditions. Ask about species origin, grade designation, and moisture content. Establish return policy for defective sheets. For premium species, request certification or provenance documentation.
Red Flags to Avoid
- Veneer priced significantly below market rates (likely inferior species or thickness)
- Sheets with visible patches or repairs sold as A-grade
- Stored in humid/dusty conditions without protective wrapping
- Vendor unable to explain species, origin, or grading
- No return policy for manufacturing defects
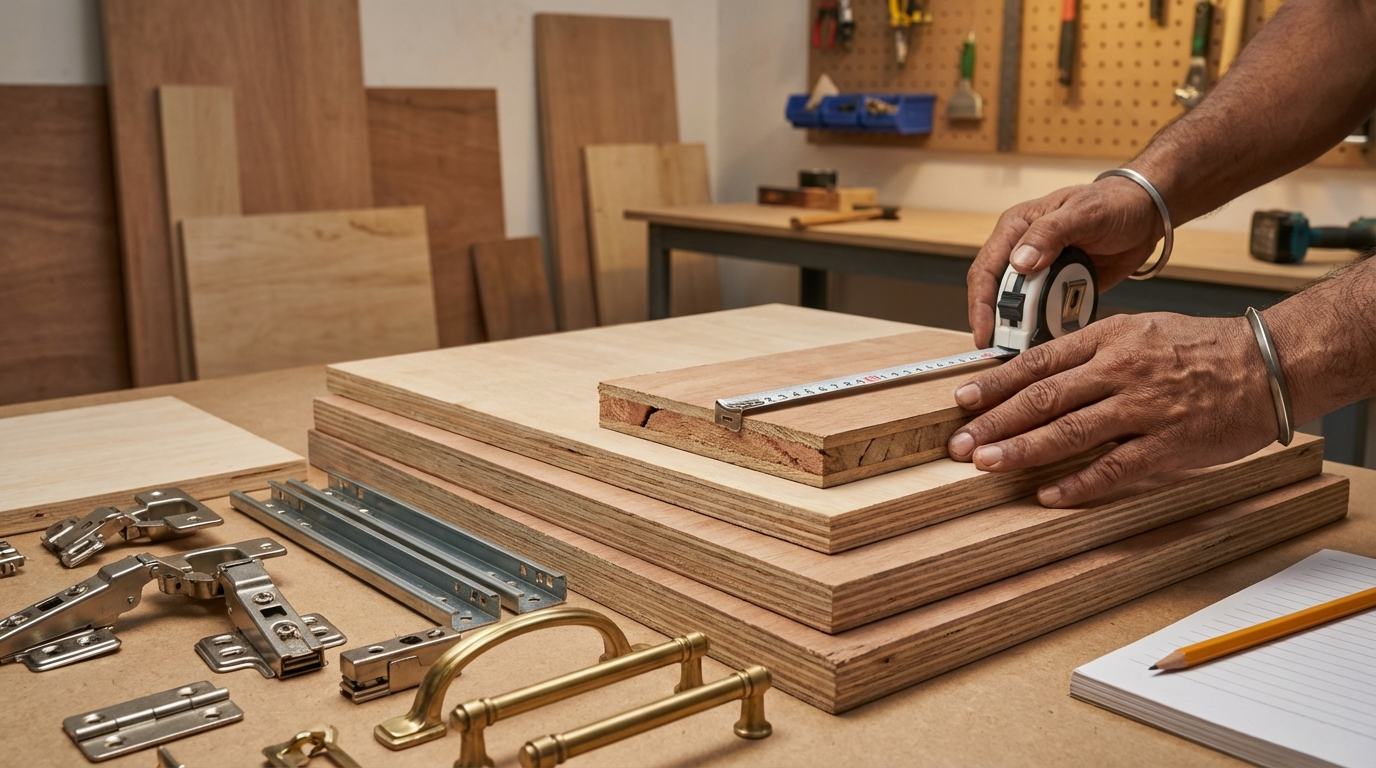
Workmanship and Installation Guidance
Veneer application requires skilled work—poor installation ruins expensive material. Whether supervising a carpenter or understanding the process yourself, these guidelines ensure professional results that last in Indian conditions.
Substrate Preparation
The substrate surface must be perfectly flat, clean, and dry. Sand MDF or plywood with 180-grit paper to provide tooth for adhesive. Fill any voids or imperfections—these telegraph through thin veneer. Check moisture content: substrate should be below 10% moisture for interior applications. Clean surface of all dust before adhesive application.
Cutting and Handling
Cut veneer with sharp blades, face up, scoring first to prevent tear-out. Allow 10-15mm overhang on all edges for trimming after application. Never fold or crease veneer sheets. Handle with clean, dry hands to prevent oil transfer. Acclimatize veneer in the installation room for 24-48 hours before application to match moisture content.
Application Methods
Contact cement (yellow adhesive) suits small pieces and allows repositioning. PVA (white glue) provides stronger bond but no repositioning time. Vacuum pressing delivers factory-quality results but requires equipment. Iron-on application works for paper-backed veneer only. Whichever method, work from center outward to eliminate air bubbles.
Edge Banding Requirements
Exposed edges must be sealed—veneer ends absorb moisture rapidly. Options include: matching veneer edging (premium appearance), PVC edge band (practical, moisture-resistant), ABS edge band (eco-friendly alternative to PVC), or solid wood lipping (traditional, allows rounding). Edge banding adhesion is critical—failed edges allow moisture ingress that delaminates the face veneer.
How Long Does Veneer Last in Humid Conditions?
Properly executed veneer work on appropriate substrates with complete edge sealing and quality finishing lasts 15-25 years even in humid Indian conditions. Failure typically occurs at edges first—moisture enters through unsealed edges, not through finished surfaces. Regular maintenance (avoiding standing water, periodic wax or polish) extends lifespan. Monitor edges annually, especially during post-monsoon, and address any lifting immediately before it spreads.
Carpenter Briefing Checklist
- Confirm substrate grade matches humidity exposure level
- Specify veneer grain direction for each panel
- Agree edge banding material and colour
- Define finish type and number of coats
- Establish inspection point after substrate preparation, before veneer application
- Clarify wastage allowance and any material return provisions
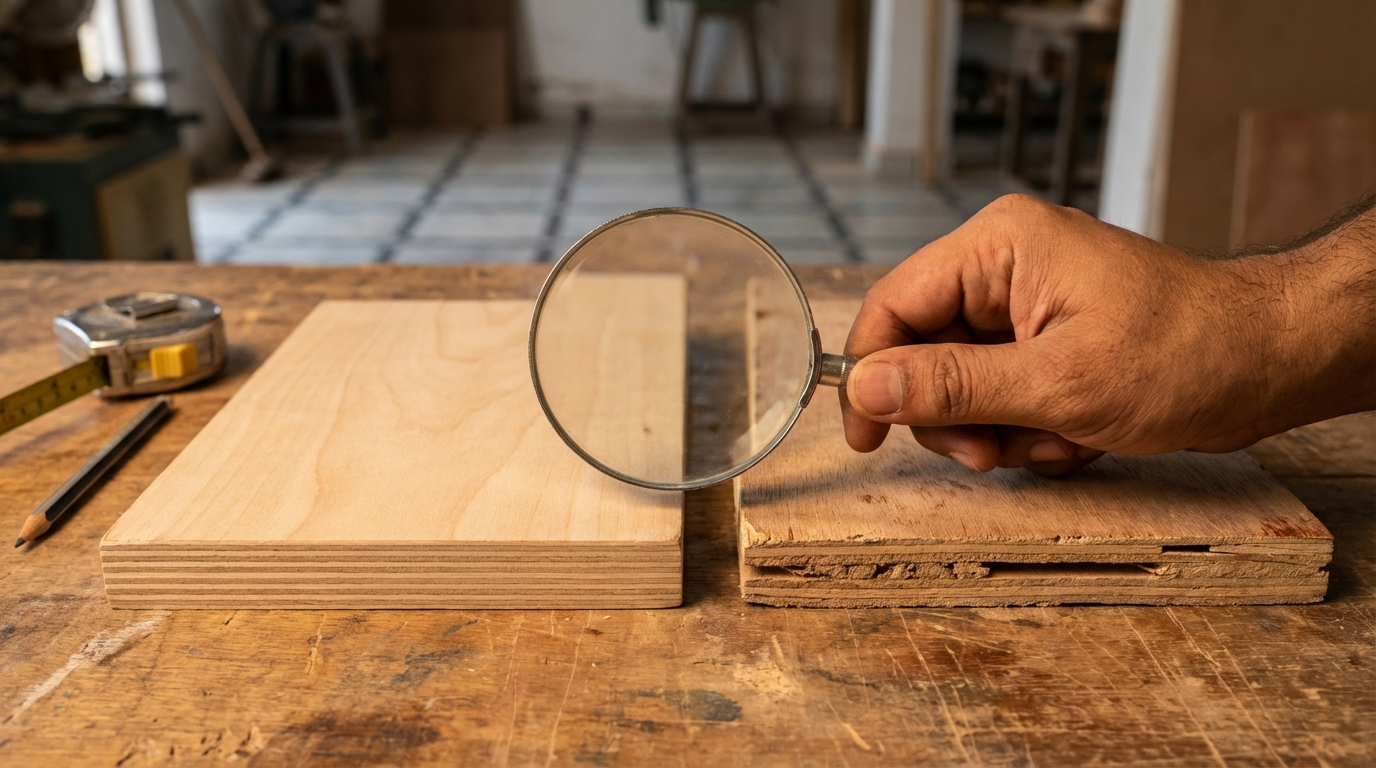
Quality Checks Without Lab Equipment
Field inspection techniques help identify veneer quality issues before purchase and during installation. These practical checks require no special equipment and reveal common problems that affect performance.
Visual Inspection Points
Examine veneer sheets in good lighting at an angle to reveal surface irregularities. Check for: colour consistency across sheets intended for same project, grain pattern flow for bookmatched or slip-matched sets, absence of cracks especially at ends, no visible repairs or patches on A-grade material, uniform thickness (edges should feel consistent around entire sheet).
Simple Physical Tests
Flexibility test: Gently flex the sheet—quality veneer bends without cracking (raw veneer) or the backing tearing (backed veneer). Brittle snapping indicates over-dried material prone to installation damage.
Weight comparison: Compare similar-sized sheets of same species—significantly lighter sheets may be thinner than claimed or from lower-density portions of the log.
Edge check: Run finger along edges—feel for delamination of backing, rough areas indicating poor slicing, or core irregularities on pre-bonded panels.
Moisture assessment: Sheets should feel room-temperature, not cold or damp. Cold/damp feel indicates recent exposure to moisture—reject such material.
Questions to Ask Dealers
- What species is this, and where is it sourced from?
- What is the thickness in millimeters?
- What grade is this classified as, and what does that grade allow?
- How has this been stored, and when did this batch arrive?
- Can I return sheets with defects discovered during application?
- Do you have more sheets from the same bundle for future matching needs?
Warning Signs to Watch
Reject veneer showing: water stains or tide marks, fungal spots (dark speckling), strong chemical odours (improper treatment), warping or cupping, edge delamination even at corners, inconsistent colouring suggesting multiple sources mixed together, repairs that weren't disclosed upfront.
Common Buyer Mistakes and How to Avoid Them
Experience across veneer projects reveals recurring errors that waste money and cause premature failures. Learning from these common mistakes saves significant time and expense.
Mistake 1: Choosing Veneer Based Only on Appearance
What goes wrong: Beautiful exotic veneer applied to MR-grade substrate in a Chennai kitchen delaminates within two monsoons.
Why it happens: Buyers focus on face material while ignoring substrate and environmental factors.
How to avoid: Always evaluate veneer + substrate + finish as a system matched to application environment.
Mistake 2: Skipping Edge Sealing
What goes wrong: Wardrobe shutters develop edge lifting and face bubbling starting from corners.
Why it happens: Edge banding seems like unnecessary expense; exposed edges aren't immediately visible.
How to avoid: Budget edge banding as non-negotiable on every exposed edge, regardless of visibility.
Mistake 3: Insufficient Finishing Coats
What goes wrong: Dining table veneer shows water marks and staining after few months of use.
Why it happens: Carpenter applies single coat to save time/cost; owner doesn't know to specify otherwise.
How to avoid: Specify minimum 3-4 coats of PU lacquer for any surface that will see regular use.
Mistake 4: Improper Acclimatization
What goes wrong: Newly installed veneer develops cracks or separates from substrate within weeks.
Why it happens: Material goes straight from dealer storage (different temperature/humidity) to installation.
How to avoid: Store veneer in installation room for 48-72 hours before application.
Mistake 5: Mixing Natural and Engineered Veneer
What goes wrong: Adjacent panels show obvious mismatch in grain character despite similar colour.
Why it happens: Cost-saving attempt to use cheaper engineered veneer on "less visible" surfaces.
How to avoid: Use consistent veneer type on all visible surfaces within the same sightline.
Mistake 6: Ignoring Grain Direction
What goes wrong: Multi-panel wardrobe looks disjointed with grain running different directions on adjacent doors.
Why it happens: Carpenter optimizes material usage without considering visual flow.
How to avoid: Specify grain direction in writing; mark sheets before handing to carpenter.
Mistake 7: Buying Insufficient Quantity
What goes wrong: Project requires additional material; new batch doesn't match original.
Why it happens: Underestimating wastage, not accounting for damage, or scope creep.
How to avoid: Order 15-20% extra; store leftover in same conditions for future repairs.
Design Ideas with Practical Material Recommendations
Veneer's design versatility suits numerous applications across Indian homes. These ideas pair aesthetics with appropriate specifications for the Indian context.
Living Room Applications
- TV unit with back panel: Walnut veneer on 18mm BWR plywood, matte PU finish, creates sophisticated entertainment center
- Bookshelf faces: Oak veneer, book-matched across doors, satin lacquer finish
- Feature wall: Smoked oak veneer on MDF panels, staggered layout, clear matte finish for drama
- Sofa-back console: Teak veneer on 12mm plywood, natural oil finish for warmth
Bedroom Applications
- Wardrobe shutters: Teak veneer on 18mm BWR plywood, vertical grain, semi-gloss PU
- Bed headboard: Burr walnut veneer as centre panel, creates natural focal point
- Bedside tables: Maple veneer, lightweight plywood construction, white wash finish for contemporary look
- Dresser unit: Cherry veneer, horizontal grain, warm tones complement bedroom palette
Kitchen and Dining
- Kitchen cabinet shutters: Oak veneer on BWR plywood, 4-coat PU, complete edge banding—suits open kitchens
- Dining table top: Thick veneer (1mm) on stable core, heavy-duty finish, handles regular family use
- Crockery unit: Glass doors with veneer frame, matching kitchen aesthetic
- Breakfast counter panel: Contrasting veneer species for visual separation from cooking area
Study and Home Office
- Study desk: Walnut veneer, 1200×600mm top on 18mm BWR plywood, multiple clear coats
- Wall-mounted shelving: Floating shelves in teak veneer, 25mm blockboard core for span strength
- Built-in bookcase: Oak veneer, adjustable shelves, clean minimal finish
What Works in Indian Homes
Indian homes benefit from veneer's warmth balancing typical marble/granite flooring and white walls. Teak remains most popular for traditional homes, while oak and walnut suit contemporary aesthetics. Dark smoked veneers work well in air-conditioned rooms but may feel heavy in naturally ventilated spaces. Light veneers brighten compact apartments but show fingerprints more readily on frequently touched surfaces.
Decision Framework: Matching Application to Veneer Choice
This practical framework matches specific scenarios to appropriate veneer selections, helping navigate the many variables involved in veneer specification.
| Application Scenario | Recommended Veneer Choice | Why This Works |
|---|---|---|
| Budget apartment wardrobes | Engineered teak veneer on MR plywood | Cost-effective, consistent matching across multiple doors |
| Premium villa furniture | Natural species on BWR plywood | Authentic character justified by budget, humidity protection |
| Coastal city kitchen | Teak veneer on marine plywood, heavy PU finish | Maximum moisture resistance for salt air environment |
| Commercial office desks (50+ units) | Engineered oak veneer, pre-laminated panels | Consistent quality, efficient production, easy replacement |
| Living room feature wall | Specialty smoked/figured veneer on MDF | Statement visual impact, controlled indoor environment |
| Children's bedroom furniture | Dyed veneer, semi-gloss finish, rounded edges | Fun aesthetics, easy clean, safety focus |
| Rental property furniture | Engineered veneer, durable finish | Balance appearance and cost, withstands tenant use |
| Heritage restoration | Natural species matched to original | Authenticity required, budget secondary |
| Modular kitchen package | Natural/engineered on BWR, factory edge-band | Consistent quality, warranty support, moisture appropriate |
Can Veneer Be Used in Bathrooms?
Veneer can be used for bathroom vanity cabinets and door faces with significant precautions. Requirements include: marine-grade (BWP) plywood substrate, complete waterproof edge sealing (not just edge band—full sealant application), marine-grade PU finish with minimum 4-5 coats, adequate ventilation to prevent humidity buildup, and positioning away from direct splash zones. Even with precautions, veneer in bathrooms has shorter lifespan than in dry areas. For moisture-intensive bathrooms, consider HPL laminate or PVC board alternatives covered in our bathroom cabinet material guide.
Maintenance and Longevity Tips
Proper care extends veneer furniture lifespan significantly. These maintenance practices address Indian conditions specifically—dust, humidity cycles, and typical household use patterns.
Regular Cleaning Protocol
Dust veneer surfaces weekly with soft, dry microfiber cloth—dust accumulation plus humidity creates surface film that damages finish over time. For fingerprints and light soiling, use slightly damp (not wet) cloth followed immediately by dry cloth. Never leave water standing on veneer surfaces. Avoid silicone-based furniture polishes which build up and prevent future refinishing.
Seasonal Considerations
Post-monsoon inspection is critical: check all edges for any lifting or bubbling, examine finish for cloudiness indicating moisture penetration, verify door/drawer operation hasn't changed (indicates core swelling). Address any edge lifting immediately—small problems spread rapidly. In dry winter months (especially North India), consider room humidifiers if veneer surfaces show fine checking or cracking.
Repair and Restoration
Minor scratches in finish can be addressed with matching furniture markers or light rubbing with appropriate oil. Small edge lifts caught early can be reglued—inject wood adhesive under lifted area, press firmly, wipe excess, tape until dry. Larger damage typically requires professional intervention. Veneer cannot be sanded like solid wood—damaged areas usually need patch replacement.
What Not to Do
Never place hot vessels directly on veneer surfaces (use trivets always). Avoid harsh chemical cleaners, especially those containing ammonia or bleach. Don't drag objects across veneer surfaces. Never attempt aggressive cleaning methods—abrasive pads damage finish irreparably. Avoid placing veneer furniture against exterior walls that may sweat during temperature differentials.
Frequently Asked Questions
What is the difference between veneer and laminate for furniture?
Veneer is real wood sliced thin and bonded to substrates, offering authentic grain patterns, natural texture, and genuine wood character that develops patina over time. Laminate is manufactured from decorative paper impregnated with resin, producing uniform patterns at lower cost but synthetic appearance and feel. Veneer costs more, requires more skilled application, and needs careful finishing, while laminate offers easier maintenance and moisture resistance. Choose veneer for premium aesthetics where authentic wood character matters; choose laminate for high-moisture areas, tight budgets, or when uniform consistency across large quantities is priority. Many premium interiors combine both—veneer on showcase surfaces, laminate on functional interiors.
How much does veneer furniture cost compared to solid wood?
Veneer furniture typically costs 40-60% of equivalent solid wood furniture, depending on species and construction quality. A teak veneer wardrobe might cost ₹85,000-₹1,20,000 where solid teak equivalent would run ₹1,80,000-₹2,50,000 for same size and complexity. The savings come from using thin wood layer over engineered substrate rather than thick solid timber throughout. Veneer also offers better dimensional stability than solid wood in Indian humidity conditions, reducing long-term maintenance costs from warping and cracking. For large furniture pieces (wardrobes, entertainment units, beds), veneer often delivers better practical value than solid wood while maintaining authentic appearance.
Can veneer be applied on existing old furniture?
Yes, veneer can be applied over existing furniture surfaces with proper preparation. Requirements include: surface must be structurally sound, flat, and stable; old finish must be completely removed or sanded to provide adhesion; any repairs to substrate must be completed first; surface must be clean and dry. Re-veneering is cost-effective for high-quality furniture frames with damaged surfaces. However, if existing furniture has particle board substrate in poor condition, warped panels, or extensive structural damage, re-veneering rarely makes economic sense—replacement becomes more practical. Consult an experienced furniture restorer for assessment before committing to re-veneering projects.
Is veneer furniture good for humid climates like Mumbai or Chennai?
Veneer furniture performs well in humid coastal climates when properly specified and executed. Critical requirements include: BWR or marine-grade plywood substrate (never standard MR grade), complete edge banding with moisture-resistant material, adequate finishing coats (4+ coats PU lacquer), and proper site installation with sealed edges. Many premium Mumbai and Chennai homes have veneer furniture lasting 15-20 years without issues. Failures typically result from specification shortcuts—wrong substrate grade or incomplete edge sealing—rather than inherent veneer limitations. For areas with direct moisture contact, combine veneer with appropriate protection or consider alternatives. Our coastal area furniture guide provides detailed specifications for humid environments.
What is the best veneer finish for kitchen cabinets?
Polyurethane (PU) lacquer provides best protection for kitchen cabinet veneer, offering excellent moisture resistance, durability against cleaning chemicals, and moderate heat tolerance. Apply minimum 4 coats with proper sanding between coats for professional results. Matte or satin finishes hide fingerprints better than gloss in kitchen environments. Some premium options include 2K (two-component) PU finishes offering superior hardness and chemical resistance. Avoid oil finishes in kitchens—they don't resist moisture adequately and require frequent reapplication. Water-based PU finishes offer easier application and lower odour but slightly reduced durability compared to solvent-based alternatives.
How do you identify good quality veneer sheets?
Quality veneer identification involves multiple checks: uniform thickness across entire sheet (feel edges, they should be consistent), no visible cracks especially at ends and corners, consistent colour within sheets intended for same project, smooth surface without bumps or depressions, proper grain pattern appropriate to claimed cutting method, and absence of repairs or patches on A-grade material. Quality sheets flex gently without cracking (raw veneer) or backing separation (backed veneer). Avoid sheets with musty smell (indicates moisture damage), visible colour variation suggesting mixed batches, or edge delamination. Ask dealer about species verification, thickness specification, grade classification, and storage conditions. Reputable dealers willingly provide this information and offer return policies for defective material.
Can veneer be repaired if damaged?
Minor veneer damage is repairable but has limitations. Surface scratches in finish can be addressed with furniture markers, light sanding and re-coating, or rubbing with appropriate oil. Small chips can be filled with matching wood filler and touched up. Edge lifting caught early can be reglued using wood adhesive injection under the lifted portion. However, deep scratches through veneer to substrate, large chips exposing core material, or extensive delamination typically require professional patch replacement—cutting out damaged section and inlaying matching veneer piece. This requires skill to achieve invisible repair. Unlike solid wood, veneer cannot be sanded repeatedly; material thickness allows only light refinishing. Prevention through proper finishing and careful use remains more practical than repair.
What thickness veneer should I specify for doors?
For flush doors, 0.45-0.6mm veneer thickness is standard and appropriate, providing good appearance with cost efficiency. This thickness allows factory application using hot press technology for reliable bonding. Thicker veneers (1mm+) add cost without proportional benefit on door applications—doors don't receive the same wear as table tops or desk surfaces. Focus budget instead on quality substrate (proper core construction, moisture-appropriate grade) and finishing quality rather than excessive veneer thickness. Ensure veneer application covers both faces to prevent warping from unequal moisture response. For main entrance doors with heavy use, invest in superior finishing rather than thicker veneer.
Is veneer environmentally better than solid wood?
Veneer offers environmental advantages by maximizing surface coverage from limited wood volume. One log that produces limited solid timber planks can yield many times more surface area as veneer slices. This efficient wood utilization reduces pressure on forests and makes precious species accessible without requiring large log volumes. Engineered veneers using fast-growing plantation timber further reduce environmental impact. However, environmental assessment must include substrate materials—plywood and MDF production has its own environmental footprint. For genuinely sustainable choices, look for FSC-certified veneers and substrates. On balance, veneer furniture typically has lower wood consumption impact than solid timber furniture while providing similar aesthetic benefits.
Why does veneer sometimes bubble or peel?
Veneer bubbling or peeling results from bond failure between veneer and substrate, caused by several factors: inadequate adhesive application (insufficient spread or wrong adhesive type), moisture infiltration through unsealed edges causing substrate expansion, applying veneer to damp substrate, extreme temperature exposure causing differential expansion, or applying veneer over contaminated surface (dust, oil residue). Prevention involves: thorough substrate preparation, appropriate adhesive selection and application, complete edge sealing, proper acclimatization before installation, and avoiding moisture contact during and after installation. Once bubbling begins, address immediately—inject adhesive under bubble, apply pressure until dry, and determine/address root cause to prevent recurrence.
Can veneer furniture handle air-conditioned environments?
Veneer furniture typically performs well in air-conditioned environments, which provide more stable humidity than naturally ventilated spaces. The controlled humidity (usually 50-60%) reduces expansion/contraction cycles that stress veneer bonds. However, transition zones pose challenges—furniture near AC vents experiences temperature differentials that can cause localized stress. Avoid placing veneer furniture directly in AC airflow path. Consistent AC operation is better than frequent on-off cycling. If AC runs only during occupied hours, expect some dimensional movement. Well-executed veneer work with proper edge sealing handles typical AC environments without issues. Dark veneers in heavily air-conditioned rooms may develop fine surface checking if humidity drops too low for extended periods.
What is the difference between teak veneer and engineered teak veneer?
Natural teak veneer is sliced directly from teak logs, displaying genuine teak grain patterns with natural colour variation and unique characteristics from each tree. Each sheet has individual character; matching across panels requires careful selection. Engineered teak veneer is manufactured to look like teak—fast-growing wood is sliced, dyed, and reassembled to create uniform teak-like appearance. Engineered version costs 30-40% less, offers consistent matching across large quantities, but lacks natural teak's authentic variation and character. For discerning eyes, natural teak's depth and variation are recognizable. For projects prioritizing consistency and budget over authenticity, engineered teak veneer provides practical teak aesthetic at accessible price points.
Final Perspective on Veneer Selection
Veneer offers a compelling combination of authentic wood aesthetics, cost efficiency, and design versatility that makes it the material of choice for quality furniture and interiors across India. Success with veneer depends on understanding it as a system—veneer type, substrate grade, application method, edge treatment, and finishing must all align with the specific environmental conditions and use requirements of your project.
The Indian market offers excellent veneer options across price points, from budget-friendly engineered varieties suitable for rental properties and commercial installations to premium natural species for luxury residential projects. Regional climate considerations—particularly monsoon humidity in coastal cities and dry conditions in northern states—influence substrate and finishing specifications more than veneer choice itself.
Invest time in selecting proper materials, specifying comprehensive finishing, and ensuring skilled application. The difference between veneer work that impresses for decades and work that fails within years often comes down to these execution details rather than the face material. Work with experienced carpenters or vendors who understand veneer's requirements, and don't compromise on edge sealing regardless of budget constraints.
For specific applications like modular kitchens, bedroom wardrobes, or flush doors, our dedicated guides provide deeper detail on substrate selection and finishing requirements appropriate to each use case. The foundational understanding from this guide equips you to make informed decisions and ask the right questions as you plan your veneer projects.
Disclaimer: This content is provided for general informational purposes based on industry practices and publicly available information. Product specifications, standards, prices, and availability may vary by manufacturer, region, and time. Readers should independently verify details with manufacturers, dealers, or qualified professionals before making purchase or construction decisions.Want Plywood Suggestions?
Share a few details and a Sainik 710 specialist will suggest suitable brands and connect you to responsive dealers.